Well, that's all for me tonight. My son wants to start a puzzle before he heads off to bed. Thanks for peeking in on me today!
Sunday, December 13, 2009
FROSTY THE SNOWMAN
Well, that's all for me tonight. My son wants to start a puzzle before he heads off to bed. Thanks for peeking in on me today!
Wednesday, December 9, 2009
WELCOME CHRISTMAS
 if I don't always complete them within the week. Plus, I have some exciting news! I was the picked as the Featured Artist for the Diva Coffee Break Designs Challenge #155. I was thrilled beyond words! Okay, enough babbling and on with the card. I added Stampin' Up!'s Chunky Glitter to my dove image. I wasn't sure how it would look, but I was pleased with the results. It just gives it a little somethin' somethin'. You know what I mean? To get the poinsettia on this card, I simply used my 5-Petal Flower punch and punched the flower out twice on Real Red card stock and added a dimensional to make it more pronounced. I also punched the flower out once on Garden Green card stock and cut two of the petals off to get the leaves. Look closely at the buttons at the top of the card. Did you notice that I didn't actually thread the buttons with real thread? I cut small strips of Whisper White card stock and threaded it through each button and attached the strips with mini glue dots on the back of the buttons. It's so much easier!
Sunday, November 29, 2009
EMBRACEABLE YOU
Wednesday, November 25, 2009
THANKSGIVING BLESSINGS
I wish you could see this card in real life. The colors are so much better. My husband tried to photograph it. I tried to photograph it and he even tried again. So I apologize for the picture, but I can't retake it. I already sent it to a retired co-worker whose health is declining. I hope it cheers him up to know that his old co-workers are thinking of him this holiday season.
I'm not really sure that this card went in the direction that I was hoping. Sometimes my cards just have a mind of their own. I just wanted to take a small break from making Christmas cards and focus on the holiday at hand - Thanksgiving. I just love this stamp set. I won it at the Cincinnati Stampin' Up! Regional in September. The leaves were stamped in Basic Brown ink and sponge daubers were used to color them in. I cut each one out, bent the leaves and added dimensionals to give them a more three dimensional look.
I'm going to make it a short post tonight as I need to clean house and prepare food for the next two days. We're off to my in-laws tomorrow and then dinner at my house on Friday.
Have a safe and wonderful Thanksgiving. I hope you share it with the ones you love! Thanks for peeking in on me today!
Sunday, November 22, 2009
Christmas Wreath

Tomorrow starts the beginning of Stampin' Up!'s ONLINE EXTRAVAGANZA sale offered through November 30th. Be on the lookout for amazing discounts offered on wonderful Stampin' Up! products. For more information, check it out here on Monday morning.
Wednesday, November 18, 2009
A Little Something For You
 Warning: Long post. Be sure to scroll down to see the inside of this card.
All I did was cut a 12" x 12" piece of cardstock into and folded it in half. Next, using your Big Shot machine, line the score line of your card almost all the way to the top of the Scallop Square die design but not quite. If you line up the score line of your card past the top of the Scallop Square die you'll end up with two beautiful scallop squares. Not the look you're going for, trust me : ) Once you've got the edge where you want it just run the die through the Big Shot machine and voila'. You get this beautiful scalloped card. To get the oval cutout in the middle of the card you'll need to use the scallop oval punch. Just line up the punch with the middle of the card and slide it up as far as it will go from the bottom of the card and punch out the oval. You'll then adhere your second piece of cardstock right over the front. Yes, you'll cover up your pretty scallop oval, but don't worry. Flip the card over so you can see where you've punched out the first oval and line the punch up and punch again. You never want to try to punch through two pieces of heavy cardstock at the same time. This may break your punch.
So, do you want to see inside? Do you?? Do you?? Okay, here it is ........................... Super cool, huh? To make the pocket for the gift card you'll just run the patterned paper through the Big Shot using the Scallop Square die again and just adhere it to the sides and bottom of your card base. DO NOT place adhesive to the middle or to the top of your patterned paper. You won't have a gift card holder then : )
This was another card my guests made at the 10 for $10 Christmas card class I had at my house last week. This card was a big hit.
If you live in or near the Waverly area and would like to attend one of my classes, please email me at l_burkitt@yahoo.com. I'll be glad to send you information about my upcoming classes and would be thrilled to have you there.
Thanks for peeking in on me today! Have a great evening!
Supplies: All Stampin' Up! unless noted; Stamps - Christmas Punches; Paper - Old Olive, Real Red, Very Vanilla, Old Olive DSP; SU! Markers- Chocolate Chip, Real Red, Old Olive; Accessories - Big Shot Machine, Scallop Square Die, Scallop Oval Punch, Chocolate Chip Taffeta Ribbon, Petal-A-Plenty Embossing Folder, Dimensionals
Monday, November 16, 2009
FROSTY AND FRIENDS
 Here's another card that was created for my 10 for $10 Christmas card class last week. I cased my card from the ever so talented Jan Tink. You can view her card here. I kept her same color combinations and card layout. I just changed the color combination around and used a different stamp set. If you look closely (or click on the picture to enlarge) you can see I added Dazzling Diamond Glitter to the snow drift. I love that stuff. It shimmers just like diamonds. I guess that's how it got its name :~)
Have a great day and thanks for peeking in on me today! I'm a little under the weather but hope to be feeling better soon.
Supplies: Stamps - The More the Merrier, Happy Everything; Ink - Basic Black, Su! Markers - Old Olive, Real Red, Black, Bermuda Bay, Crushed Curry, Pumpkin Pie; Cardstock - Bermuda Bay, Crushed Curry, Real Red, Whisper White; Accessories - Dazzling Diamonds Glitter, 2 Way Glue Pen, Eyelet Border Punch, Mellow Moss Grosgrain Ribon, 1/16" Punch, Real Red Brad
All supplies are Stampin' Up! unless noted.
Saturday, November 14, 2009
BACK IN THE SADDLE AND A CHALLENGE TO BOOT

Wednesday, October 28, 2009
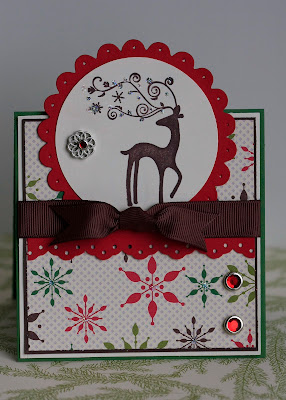
YOU KNOW DASHER AND DANCER AND PRANCER...........
Saturday, October 24, 2009
10 for $10 Christmas Card Class
What: 10 for $10 Christmas Card Class
Where: 2697 Pennington Road, Waverly
When: (Your choice) Thursday, November 12th, from 6:00 p.m. to 9:00 p.m. or
Saturday, November 14th, from 3:00 p.m. to 6:00 p.m.
Cost: $10 for 10 different Christmas cards with envelopes.
RSVP By: Pre-payment will be due by Saturday, November 7th, to reserve your spot. This will allow me to purchase all the necessary supplies and pre-cut all card stock for the projects you will be making.
What to Bring: Your choice of adhesive and scissors. Adhesive will be available for purchase at class for $5.00.
To ensure a reserved spot, please be sure to include your class date preference when submitting your payment. Class space is limited, so be sure to sign up early!
If you have any questions or need directions, please feel free to email me at l_burkitt@yahoo.com.
Thanks for peeking in on me today!
Thursday, October 22, 2009
DEAL OF THE WEEK #3
Throughout October, get all-new Deals of the Week—with select products up to 50% off! See below for this week’s Deals of the Week:
Now through October 26, 9:50 AM (MT)
1/2" Library Clips
Regular Price: $6.95
Deal of the Week Price: $3.99
Basic Jumbo Grommets
Regular Price: $6.95
Deal of the Week Price: $4.49
Circle Designer Brads
Regular Price: $5.95
Deal of the Week Price: $3.99
Mini Library Clips
Regular Price: $12.95
Deal of the Week Price: $8.99
Visit my Online Store today to take advantage of these great offers! Shop Stampin' Up! 24/7 here.
Monday, October 19, 2009
TLC CLASS PROJECT #2 - FAUX CLOUDS
 Here is another project my customers made at my Technique Lovers' Class last Thursday. If you've followed my blog, this card may look vaguely familiar from an earlier post. You can view it here. This card features the faux cloud technique. It's really easier than it looks and packs a big WOW factor. All you need is a scallop circle punch and a scrap piece of cardstock. Just punch out your scallop circle and cut it in half. This gives you a cloud template. What's that you say? You don't have this punch - oh, you just may have to get it. Not to worry though! Just freehand a cloud on some scrap cardstock and you've got yourself a cloud template. Next, you'll take a sponge or a sponge dauber and ink it up with some Bashful Blue Classic Ink. (I personally prefer the sponge dauber. It gives you a more muted effect.) Place your cloud template over your project and "swirl" your inked sponge in circular motions over the edge of your template. Ta Dah! You've got clouds! Just make sure to move your template around and in different angles to create the clouds. It's that easy! Now go out and make yourself some happy, little clouds! (I watched Bob Ross when I was a kid.)
 That's it for me. Thanks for peeking in on me today!
(All supplies are Stampin' Up! unless noted.)
Supplies: Stamps - Branch Out, Sincere Salutations; Paper - Old Olive, Soft Suede, Whisper White; Ink - Soft Suede, Rose Red, Old Olive, Rich Razzleberry, Bashful Blue; Accessories - Circle Scissors Plus, Scallop Edge Punch, Scallop Circle Punch (cloud template), Scallop Oval Punch, Small Oval Punch, Dimensionals, Sponge Dauber, Rich Razzleberry Polka Dotted Grosgrain Ribbon
Sunday, October 18, 2009
TLC CLASS - PROJECT #1

Thursday, October 15, 2009
BE BACK SOON . . . . .
If you live in or near the Waverly area and would like to attend one of my stamping classes just send me an e-mail at l_burkitt@yahoo.com. I'll make sure to send you information about upcoming classes.
Monday, October 12, 2009
Stampin' Up! - Deals of the Week #2
Saturday, October 10, 2009
HEARTFELT THANKS
Wednesday, October 7, 2009
WELCOME LITTLE ONE

I attended a baby shower for a young lady in my church congregation last night. (I say young because she's probably in her late 20's or early 30's. She's younger than me so that makes her young.) She'll be having her baby next Monday via C-Section. I had a wonderful time at our hostess',Vicki's, home. She's such a terrific person. Here's the card I made for the shower. If you haven't guessed, it's a girl! I used the instructions for making a tent topper card from Splitcoast Stampers. These cards are easy and are actually a lot of fun of fun to make.
Supplies: Stamps - Nursery Necessities, Cheep Talk; Ink - Melon Mambo, Basic Black, SU! Markers - Rich Razzleberry, Old Olive, Soft Suede, Crushed Curry; Paper - Razzleberry Lemonade DSP, Melon Mambo, Rich Razzleberry, Whisper White; Accessories -Sponges, White Gel Pen, Paper Piercer, Regal Rose 5/8" grosgrain ribbon, Big Shot machine, Circles #2 dies, Scallop Circle #2 dies
Order Stampin' Up! 24/7 here!
Thursday, October 1, 2009
STAMPIN' UP! DEAL OF THE WEEK - PUNCHES
During the month of October, Stampin' Up! will offer several discounted products as "Deals of the Week." No limits and no minimum purchase required. Check out this week's deal on Stampin' Up! punches here. Stampin' Up!'s Deal of the Week #1 ends on Monday, October 12th at 9:50 a.m. Don't forget to check back each Monday in October for an all new Deal of the Week!
Bird Nouveau
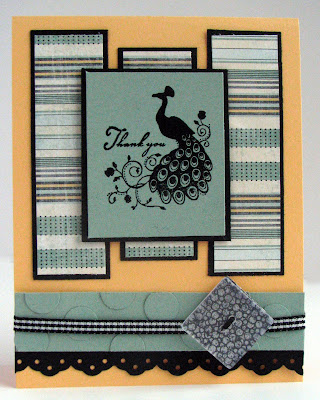 Okay, here's the scoop. I'm totally terrified of Stampin' Up!'s Soft Subtles color palette. Don't get me wrong. The colors are beautiful. I just tend to shy away from them. So, every now and then I try to push myself outside my comfort zone and let's just say my deodorant was working overtime this time around. You see I was sweating a little when I pulled out the Apricot Appeal and Sage Shadow card stock for this card. I'm not sure why the apricot looks a little banana colored in this photo. Perhaps, the saturation was tweaked a little too much on my photo editing program. You'll just have to trust me. It is truly apricot in real life. Even though it is hard to see, I embossed my bird with embossing powder to give it a little more dimension. By the way, I think the bird would be beautiful water colored in with bold colors. It would give it a little something, something. I also tried to do a little "faux embossing" by adding the tone on tone circles to the Sage Shadow section of the card. (The actual name of this technique is escaping me at the moment. Feel free to leave me a comment if you know the name of this technique.) The button is just a clear Stampin' Up! button with Designer Series Paper behind it. I used the Mojo Monday Sketch 103 for the layout of this card. That's it for me!
Thanks for peeking in on me today!
Supplies: Stamps - Very Thankful; Ink - Basic Black Craft Ink; Paper - Nouveau Chic DSP, Apricot Appeal, Sage Shadow, Basic Black; Accessories - Clear Stampin' Emboss Powder, Eyelet Border Punch, 1/2" Circle Punch, Black Gingham Ribbon, Clear Button
Tuesday, September 29, 2009
INTRODUCING THE ALL NEW STAMPIN' UP! CLEARANCE RACK

Check out the all new Clearance Rack section of Stampin' Up!'s online store. Clearance rack items are retired, discounted Stampin' Up! items which are available online and only while supplies last. No short-term promotions here, folks! This is a permanent part of Stampin' Up!'s online store. Hurray! So, check out these drastically reduced products here before they are gone forever. Make sure you check out the Clearance Rack regularly as items will change often.
You will want to purchase the Clearance Rack items directly online as items sell out quickly. Items may sell out before you get your order to me and I have a change to place that order. So, what are you waiting for? Go check it out right now!
Friday, September 25, 2009
CHRISTMAS IN BERMUDA

Well, not actually Christmas "in" Bermuda - just Bermuda Bay ink. It got your attention though, didn't it? I know these are pretty non-traditional Christmas colors, but I thought I'd give them a try together. After talking to fellow demo, Lisa Curry, at the Cincinnati Stampin' Up! Regional I decided to try out the new Bermuda Bay In Color. (Hi, Lisa!) You see, we had a discussion on whether or not we've used this color yet. Well, I had not - until now.
I'm not sure you can see it in this image, but I've used the new Frost White Shimmer Paint from the new Holiday Mini Catalog to ink up my snowflakes. I love the sparkle of the Shimmer Paint. It is very pretty in real life. I've paired the Bermuda Bay with Soft Suede and added a clear rhinestone from the Pretties Kit for a little extra bling. I used the Pals Paper Art Simple Sketch for the layout of my card.
Well, that's it for me. For some reason, I have a monster headache today. Hope you enjoy the rest of your weekend and thanks for peeking in on me today.
Supplies: Stamps - Serene Snowflakes, Teeny Tiny Wishes; Ink - Soft Suede, Frost White Shimmer Paint;
Paper - Thoroughly Modern DSP, Whisper White, Bermuda Bay, Soft Suede; Accessories - Clear Rhinestone from the Pretties Kit, Bermuda Bay 1/2" Polka Dot Grosgrain Ribbon, 1 3/4" Circle Punch, 1 3/8" Circle Punch, 1 1/4" Circle Punch, Sponge Dauber, Paper Piercer
Shop Stampin' Up! here 24/7!
Thursday, September 24, 2009
SEEING DOTS

Hurray for me! I actually made the deadline to play along with the Mojo Monday Sketch Challenge this week. It's a new world's record folks! If you're looking for a springboard to get your creative juices flowing then you should head over to the Mojo Monday blog. (After you check out my blog, of course.)
Monday, September 21, 2009
BLOG CANDY WINNER
Don't forget to check back with me this week! I've got some cards to show you.
Thanks for stopping by!
Sunday, September 13, 2009
BLOG CANDY TIME

Friday, September 11, 2009
OH, BUMMER!
Thanks for stopping by!
Wednesday, September 9, 2009
HOLY SMOKES! IS THIS THING REALLY WORKING?
Sunday, September 6, 2009
WINGS OF FRIENDSHIP

If you're lucky enough to have tomorrow off, please enjoy it! I know I'm looking forward to it! Thanks for visiting me today!
Supplies: Stamps-Wings of Friendship, Trendy Trees (sentiment); Paper-Cottage Walls DSP, Rich Razzleberry, Old Olive Textured C/S, Orchid Opulence, Whisper White; Ink - SU! Markers-Rich Razzleberry, Old Olive, Orchid Opulence; Accessories-Mat Pack, Paper Piercer, Ice Circle Rhinestone Brads, Rich Razzleberry Polka-Dot Ribbon, Small Oval Punch, Wide Oval Punch (All supplies are Stampin' Up! unless noted.)
Friday, September 4, 2009
GIVE ME SOMETHING GOOD TO EAT
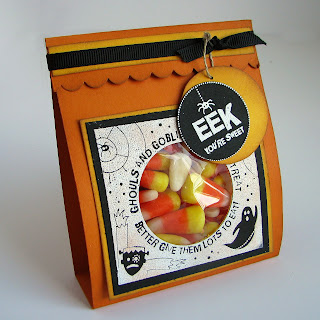 k of the moon on my "Eek you're sweet" tag. (Although, my husband said, "Ohhhh, yeaaaaah, I think I see it." So, I guess it wasn't that obvious. Oh well! I stamped my main image in Whisper White craft ink and then heat embossed it with white embossing powder. I used my 1 5/8" circle punch to punch out the center to let the candy show through. I also pulled out my sponges and sponged the edges of the pouch for good measure!
Hope everyone has a fun and safe Labor Day! Thanks for visiting me today.
Supplies: Stamps - SU's Sweet Centers; Paper - Pumpkin Pie, Basic Black, Summer Sun; Ink - Whisper White Craft Ink, Pumpkin Pie, Creamy Caramel; Accessories - Basic Black Grosgrain Ribbon, Linen Thread, Paper Piercer, White Embossing Powder, Heat Gun, 1 3/4" Circle Punch, 1 3/8" Circle Punch, Scallop Edge Punch (All supplies are Stampin' UP! unless noted.)
Shop Stampin' Up here!
Tuesday, September 1, 2009
SMILING FACES
 I'll be the first to admit it, I'm not the biggest Halloween fan. But for some reason I just couldn't resist these cute little pumpkins from the Twick or Tweet stamp set from the new Holiday Mini. The new mini is just packed full of wonderful stamp sets! I used the patterned paper from Stampin' Up!'s Kaleidoscope Designer Series Paper pack. This paper is not typical Halloween. It's very fru-fru with pinks, blues and greens. For some reason I thought that these papers would look good "Halloween" style. I colored my pumpkins in using a blender pen and Really Rust and Only Orange US classic ink pads. The pumpkins image is stamped with black Stazon Ink to keep the black ink from smearing when water coloring the image in. I also sponged around my stamped image and the patterned paper to give them a more eery feel.
Thanks for peeking in on me today. Hope you are having a wonderful day! Feel free to leave me a comment if you like. I really do enjoy reading them.
Supplies: Stamps-Twick or Tweet, Teeny Tiny Wishes; Paper-Kaleidoscope DSP, Only Orange, Basic Black, Whisper White; Ink-Jet Black Stazon, Only Orange, Really Rust, SU Markers-Green Galore, Summer Sun; Accessories: Dazzling Diamonds Glitter (stars on the hat), Vintage Brads, Basic Black 1/4" Grosgrain Ribbon, Sponges, Blender Pens, Paper Piercer, Photo Corners Punch, 1 3/8" Circle Punch, 1 3/4" Circle Punch
THE NEW HOLIDAY MINI IS HERE!

Wednesday, August 26, 2009
SO GRATEFUL
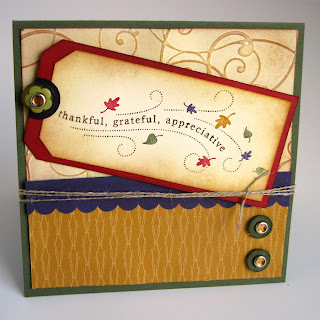 Here's a sneak peek from the upcoming Stampin' Up! Mini Holiday Catalog that comes out on September 1st. Boy, are you going to love this mini catalog. Lots of great stuff in this one. This image is from the "Wandering Words" stamp set. There are three stamps in this set containing this fall stamp, a Christmas scene stamp and a Valentine theme stamp. I must admit I have a little trouble knowing what to do with these long stamps, but I'm going to try my best and figure them out.
I used my Big Shot machine with the texturz plate for the background. I just spritzed my cardstock with water and ran it through my machine to get a deeper impression. To make it stand out a little, I sponged over the embossing with More Mustard and Close to Cocoa Stampin' Up classic ink pads.
Can you believe autumn is just around the corner? Personally, it is my favorite time of year. Hope to post another sneak peek from the new mini catalog soon.
Thanks for checking in with me today.
Supplies: Stamps - SU's Wandering Words; Cardstock - Ruby Red, Always Artichoke, Very Vanilla, Elegant Eggplant, Autumn Traditions DSP; Ink - More Mustard, Close to Cocoa, Always Artichoke, SU Markers - Soft Suede, More Mustard, Always Artichoke, Elegant Eggplant, Ruby Red; Accessories - Sponges, Linen Thread, Paper Piercer, Playground Designer Series Buttons, Fire Circle Rhinestone Brads, Big Shot Machine, SU's Background 1 Texturz Plate, Dimensionals, Punches - 1/2" Circle, 3/4" Circle, Scallop Edge, Tag Corner
Monday, August 17, 2009
BACK FROM VACATION
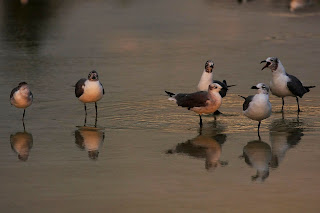 Not sure why some of these guys are on one foot!
Sunset at Ft. Myers Beach - absolutely beautiful!

Picture of my husband, Dave, and me on our last night at Ft. Myers Beach. It was about 95 degrees and we were sweat balls. LOL!
I received a package of new Stampin' Up! goodies from the upcoming Mini Catalog while I was gone. Hope to play with my new stamp sets soon and get some cards posted!
Thanks for stopping by and visiting me today!
Saturday, August 1, 2009
HERE FOR YOU
 Have you tried the poppin' pastels technique? It's been around for a while, but I've never tried it. It's a really cool technique. Just stamp your image using Versamark ink and then rub colored chalk over the image. I used the baroque image from the Friends 24-7 stamp set along with Old Olive and Rose Red chalk on this card to replicate the technique. Okay, maybe I'm easily amazed but I like this technique. (I already said that didn't I?) I also ran my Rose Red cardstock through the Big Shot machine using the polka-dot texturz plate and then sponged Very Vanilla craft ink over it to make the dots pop out a little. This was the first time I tried out the eyelet border punch too and I'm loving it! To be honest, I wasn't crazy about this punch at first, but now I don't see this thing collecting much dust.
Supplies: Stamps - Friends 24-7; Ink - Versamark, Soft Suede; Paper - Natural Ivory, Soft Suede, Very Vanilla, Rose Red, Rose Red Designer Series Paper; Accessories - Very Vanilla Hodge Podge Hardware, Chalks, Sponges, Old Olive Grosgrain Ribbon, Linen Thread, Big Shot Machine, Texturz Plate, Designer Label Punch, Eyelet Border Punch
Wednesday, July 29, 2009
You're A Blast

Tuesday, July 28, 2009
Deal of the Week 5
Tuesday, July 21, 2009
DEAL OF THE WEEK 3

Sunday, July 19, 2009
Stinkin' Sweet

Thursday, July 16, 2009
THE CIRCLE OF LIFE

Wednesday, July 15, 2009
Deal of the Week
ETA: Scroll down for a picture of today's card post.
Tuesday, July 14, 2009
ALWAYS ON MY MIND
 I don't really know what I was thinking when I pulled all these colors together for the Mojo Monday Week 92 Sketch. Looking back I think I should have swapped the pumpkin pie card stock for more of an old olive color. Oh well, like I said in an earlier post, I'm kinda in a weird funk. I really do love the bird image from this set but I can't seem to find the right combinations for him yet. I guess I'll just have to keep trying.
Thanks for checking in with me today!
Supplies: Stamps - Always; Paper - Sweet Always DSP(Retired), Whisper White, Chocolate Chip, Pumpkin Pie, Ink - Chocolate Chip, Pumpkin Pie, SU! Markers -Regal Rose, Pumpkin Pie, Old Olive; Accessories - 1" Circle Punch, 1 1/4" Square Punch, Scallop Square Punch, Flower Fusion Felt Flowers, Vintage Brads, Paper Piercer, Sponges
Monday, July 13, 2009
The Big 7 - "OH!"
 This is the card I gave my father-in-law for his big "70th" birthday! He used to tease me and say I was his "favorite" daughter-in-law. Of course that's when he only had ONE daughter-in-law. That's okay. I always tell him he's the best father-in-law I've ever had. (Maybe it's because he's the ONLY father-in-law I've ever had!) I have to admit he is a great father-in-law though!
Sunday, July 12, 2009
Perfect Pear

I used the pear from Stampin' Up!'s "Cheep Talk" stamp set as my main image. As you can tell, if you click on the picture for a closer look, I went a little crazy with my paper piercer. I love that thing. My piercer looks like it's been to Mars and back - not sure how it ended up like that. I colored in the pear images with markers and traced the outside edge of the pears with the Old Olive marker. Again, I used my favorite color - chocolate! It just makes everything better! I also used the Mojo Monday Week 94 sketch for the layout of my card. Be sure to check back with me this week. I'll have more cards to show you. Thanks for peeking in on me today.
Supplies: Stamps - Cheep Talk; Paper - Good Morning Sunshine DSP (retired), Whisper White, Kiwi Kiss (retired), Summer Sun, Chocolate Chip; Ink - Whisper White Craft Ink, SU! Markers - Summer Sun, Chocolate Chip, Old Olive; Accessories - Mat Pack, Paper Piercer, White Embossing Powder, Sahara Sand Watercolor Crayon, Blender Pen, Vintage Brads, Photo Corners Punch, Designer Label Punch, Word Window Punch, 1" Circle Punch


